
Login & Password
To log in to the admin dashboard for your website, you will go to [your-domain]/wp-admin and log in with your username and password.
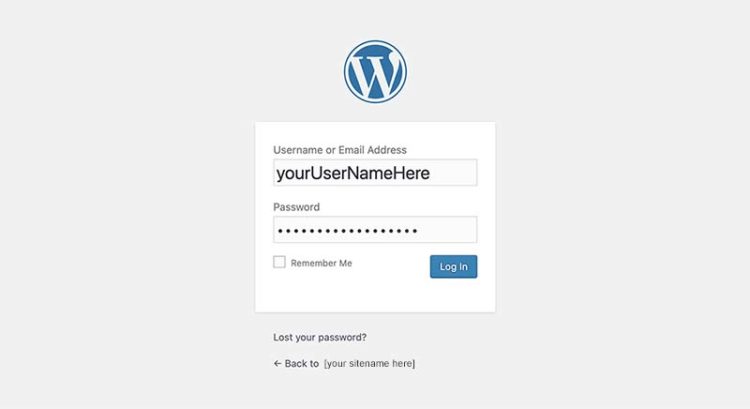
If you forget your password you can click “Lost your password?” to get an email to re-set it. If you do re-set your password, make sure it is a super-strong password (either the one WordPress will auto-generate for you or one that is nearly as strong) to prevent hackers from gaining access to your website and using it for their own purposes. If you want to use a password that you can remember, consider using a sentence of at least six words that has some private significance or memorable quality.
The login will open a dashboard where the options you need to update the site content are all in a black sidebar on the left (click the “W” in the top left corner if the sidebar is not visible). We sometimes call this the “backend” of your website (while the public-facing pages are the “frontend”).
When you are logged in you (and only you) will also see a black toolbar at the top of every page and post in your live (frontend) site—with links enabling you to edit parent-level pages and posts or create new pages and posts.
If you are on a complex page that includes content from multiple different pages (eg the various sections of a homepage or an inner page that includes many sections) or an index page that includes content from multiple posts (often excerpts that link through to full single pages), you will need to use the green-highlighted Edit links in the page itself (if they are available) or find the individual child-pages or posts via the dashboard.
EXPLORING THE DASHBOARD
Your dashboard will look like this at the top left but further down there will be site-specific links to various custom post types that we’ve created for you. You will also see links to the pages for search engine optimization (“Image Alt Text” and “SEO Entry”).
Briefly (more details follow), you’ll see:
Posts to write new articles for your blog if you have a blog (or edit existing posts). If your website does not have a blog, ignore this link. It’s there because WordPress was originally developed as a blogging platform, so the installation always includes this option as a default. A blog can always be added to your website if you want one, but we would still need to style the pages to integrate it with the rest of your website.
Media to add images, audio files and pdfs (particularly if uploading in large batches; you can also upload your images directly to a page or post). Make sure you use JPEGs not PNG files (unless you need transparency). Upload images with the longest dimension ≤2560px to avoid the WordPress “scale” version (which will be blurry). You can resize the jpegs in the WordPress image editor—they should be no larger than 1200px max dimension for a regular page (larger images are sometimes used for banners or for zooming to details). Edit the title field for the images with a good display title and add captions if your usage is set up to display captions. See What Size Should My Images Be For The Web? for more on image sizing.
Pages to edit the content of some of the pages in your website (typically the about page and the contact page and at least some of the home page—but other than these pages, the pages in your website might be displaying content from custom posts).
Comments will show comments from your blog should you have one but if you don’t have a blog this will be another dormant link.
After that we set up however many custom post types your website needs. These may be named Projects, Books, Artwork, News, Events, etc—whatever kinds of content you will be adding to your website on a continuous basis.
Image ALT Text is to add or edit SEO-friendly descriptions for images
SEO Entry is to add or edit search-engine-optimized page-titles and meta descriptions for each page or post.
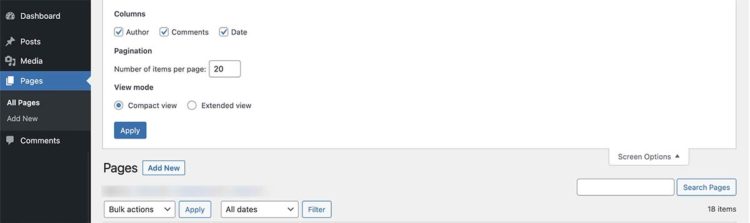
Within any Dashboard section (posts, pages, etc), there are multiple ways of filtering the items in the list and there is always “search” if there is one particular item you want to find and you know the title.
There is also a tab at the very top of the window for “Screen Options” and here you will find options such as changing the number of items per page in the list.
ADDING NEW BLOG POSTS
If your website includes a blog, click “Add New” under Posts and enter title and text, using the formatting tools available to add sub-headers if you need to break up the text, use bold, italics, add links etc. You can also add images to posts using the “Add Media” link. Generally the “Visual” editor is all you need but if you need to check on something that isn’t working and you know enough html to be able to tweak it, you can switch to the “Text” editor (in the more recent version of WordPress, this involves clicking the three dots at the top right of the WordPress window).
The appearance of the content as you enter it in the backend will not match the way it displays in the live website because your website is using a stylesheet that overrides the backend styles.
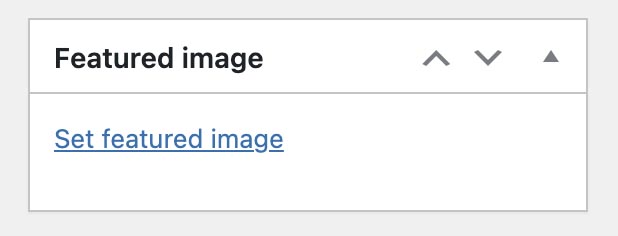
If your blog uses an index page with a thumbnail image for each blog post excerpt, you need to attach an image as the “Featured Image” per the option in the right sidebar (see screenshot below).
If you want to display that image in the main body of your full blog post, you need to also include it in the main content field via the “Add media” option there (can be at the beginning or further down).
If you want to add a link, use the link icon in the formatting toolbar. There’s an option to set links to open the destination page in a new window, and it’s a good idea to do this if you are linking to another website (so your visitor can easily return to your site if they want to). Click the pencil icon to put the link in edit mode then click the gear icon to see the options (like “Open in a new window”).
You can view the post in preview mode via the link at the top of the page. You can save the post in draft mode until it is ready to publish. Click “Publish” when you are ready to publish the post to live. You can edit the publication date to be in the future and you can also edit a publication date to a past date.
ADDING NEW CUSTOM POSTS
The records for your content that you will add to one by one over time are created with custom post types. These may be Books, Artworks, Projects, Photographs, Events, etc. They’re specially set up for the content on your site and will use the custom fields below the main content field for any data that’s needed for your work (these custom-created fields will display in an expandable box with a label specific to your content).
There’s a major advantage to creating a full record for each piece of work, as you then get a single page for that work and you can optimize it for search engines and get much better results than if you loaded everything into one page.
You can create a new custom post type record from the live site when you are logged in by using the “New > [custom-post]” link (replace “custom-post” with whatever name yours have been given). Make sure you click the “New” link that belongs to the right kind of post.
Give your custom post its title as you create the record so that the url that is generated for the record reflects the name (before you click “publish”). If you don’t do this, the system will generate a url based on the record’s unique ID—which isn’t terrible, but it’s preferable to have a descriptive url for easier identification.
The text goes in the main field at the top of the page. Most custom posts take a representative image for the index pages which you will add via the “Set featured image” link on the right of the edit page (see blog posts section above).
If you publish the page before it is ready, you can always go back and change its status to “draft” and it will hide it from public view.
When you are ready to click “Publish” you can edit the year of the publication date to match the year the book/artwork/article etc was published or created.
EDITING THE PARENT/INDEX PAGES
When you are logged in, you can use the “Edit Page” links in the black toolbar at the top of the page to open any single pages or posts in edit mode and make changes to the images and/or to the texts.
Index pages (any parent page that includes dynamic links to pages/posts below it), will display a little EDIT link with a pencil icon next to text you want to edit (it will flash green when you hover over it)—as the content on these pages will often be excerpts from many individual posts. Where the excerpt is being used for a parent/index page, make sure you edit the excerpt, not the main content.
All pages and posts have both a main content field and an excerpt field. The main content field is below the title field and has formatting options in a bar at the top. The excerpt is usually found in the right sidebar and it does not have formatting options. If you want to add formatting to an excerpt, you need to enclose the phrase that you want formatted in html tags eg <em>[phrase]</em> for italics and <strong>[phrase]</strong> for bold. The main content text will display on the main single page for that page or post and the excerpt is usually only used for pages that draw snips from many pages into one long index-like page.
You can also go to your dashboard and find the page or post to edit there but it will save you a hunt if you use the EDIT links.
Whenever we’ve added custom fields, you will find these in labeled sections below the main content field.
EDITING A GALLERY WITHIN THE MAIN CONTENT FIELD
Sometimes we code a section up to display a gallery of images from within one page or post and if we are doing this on your website you’ll choose “Add Media > Create Gallery” at the point where you get the option to add a new paragraph or image or gallery or many other things. Once you click the “Add Gallery” icon, you are shown a message to: “Drag images, upload new ones or select files from your library.” Add the images you want and click the “Create a New Gallery” button then the “Insert Gallery” button and finally, back on the page itself, remember to save the page (either publish it or save the draft, depending on what stage you are at).
To go back and make changes in a gallery in the main content of a custom-post, click on the gallery to highlight it. A blue border will appear around the gallery and click the pencil icon at the top of it. If you want to delete any images from the gallery, click the pencil icon to put the whole gallery into edit mode first then delete images one by one. Do not click the “X” at the top of the gallery unless you want to delete the entire gallery. If you make a mistake and delete something by accident, just click out of the post without clicking “Update” and come back and make your changes again.
To go back and make changes in a gallery in the main content of a page, you’ll need to first click on one image in the gallery (which will then display a blue border around it) then click the gallery icon on the left of the toolbar that will appear (it will have a tooltip: “Select Gallery”). At this point (and not before) you can delete images you want to delete or, by scrolling down to find the upload option below the gallery, upload a new image or choose one from the media library. Once you have added a new image you can reposition them (and give them captions if you are using captions).
Remember to click BOTH “Update Gallery” to update the gallery itself AND “UPDATE” on the page to which you return to save your changes (two blue buttons).
SEARCH ENGINE OPTIMIZATION WORK
Search engines rely heavily on the texts on your pages to determine whether or not your content is likely to be of interest to someone who has entered a particular search. Text that is styled as a header will be understood by search engines to be particularly important and phrases that occur with frequency will also be understood to be particularly important.
Wherever your website includes texts, it is worth looking at the text you have on the page to see if it includes phrases that someone who’d be interested in the page content might actually type into a search.
In addition to the on-page text (and especially if your pages are image-heavy, text-light), you should use the options for search engine optimization that allow you to add descriptions that don’t show on the pages themselves. This will make your site significantly more effective if you do it well.* These are as follows:
Image ALT Text
Here you should describe your images in a way that both describes the image content and is also a good additional hint for search engines about what the page content is about (use phrases that people are likely to put into search engines). This content can be entered image-by-image when you upload an image or you can add/edit the image alt text via a link in the dashboard sidebar.
SEO Title and Meta Description
Neither of these is visible on the page itself but they provide the content for search engines to understand your pages and the title and probably also the meta description will show up in the search results in search engines. This is best done from the page called “SEO Entry”. You’ll see the link in the dashboard sidebar. You can open the page or post by clicking on the title to copy/paste a bit of the text to use for the meta-description.
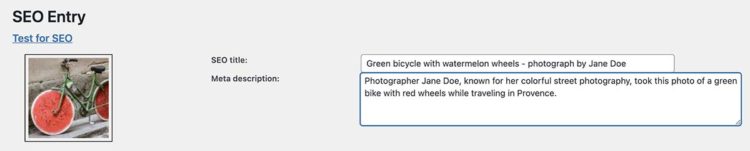
The SEO Title should begin with a very specific phrase that both describes the page content and could match an actual search query (eg “green bicycle with watermelon wheels” if this bicycle happened to be famous in some way or someone had seen a this bike and wanted to find out about it).
The meta description should extend the information in 1-2 concise sentences, also using phrases that might appear in someone’s search.
E-Commerce
If your website uses full e-commerce, chances are we have used a plugin called WooCommerce for this and the following article will be of help in maintaining this:
https://woocommerce.com/posts/manage-woocommerce-updates-easily/
Site Health Maintenance
Before doing any upgrading of WordPress version or plugins, install the plugin Updraft (if it is not already installed) and use it to make a full backup (Database, Uploads, Themes, Plugins, Other). Go to Updraft > Settings to find where to do this and start with the blue “Back up Now” button. Then go ahead with upgrading via the upgrade buttons provided. Check that everything’s working fine and, if not, restore to the backup so that the upgrades can be done more carefully (eg by developer).
Being careful to make backups is especially important if you have added plugins yourself. While we use plugins sparingly and only use plugins known to be well-maintained at the time of installation, there are many that can cause problems during installation or updating.
NB: Using Updraft is not a method that covers you for all backup needs but it is sufficient for this process.
Upgrading to the latest version of PHP is done through your hosting company’s Control Panel (look for multiPHPManager) and is a safe, reversible process should anything break in the process. Go back to the previous version if your site doesn’t work properly after the upgrade—and get developer help.
NB Writing these instructions in a way that will be general enough to apply for all websites is a bit of a work-in-progress. If you find that your website does not have one of the features mentioned (this might be the case with older sites, as we make improvements over time), please email Rohesia.
